


Jelly Donut Focaccia
Chewy and airy with a tangy lemon glaze.


Hi Bakers!
Often when I make my recipes and write these newsletters I sneak in bits of encouragement and life advice. Like how I think we should be meal prepping muffins for the week, making our own loaf cakes instead of the coffee shop variety, trying to grow our own food, or implementing birthday cake rituals. But this recipe? It’s all about fun and flavor! Well, mostly…
For starters, did you know you can make focaccia at home? Because you totally can. In fact it's probably the easiest bread you can make! This one uses my no-knead, overnight dough. The only thing you really need is time.

I do love a good donut from time to time. A fresh Lee’s Honey Dip or light and fluffy malasadas from Leonard’s Bakery can’t be beat. But unless they are still warm from the fryer, donuts aren’t often worth it, in my opinion.
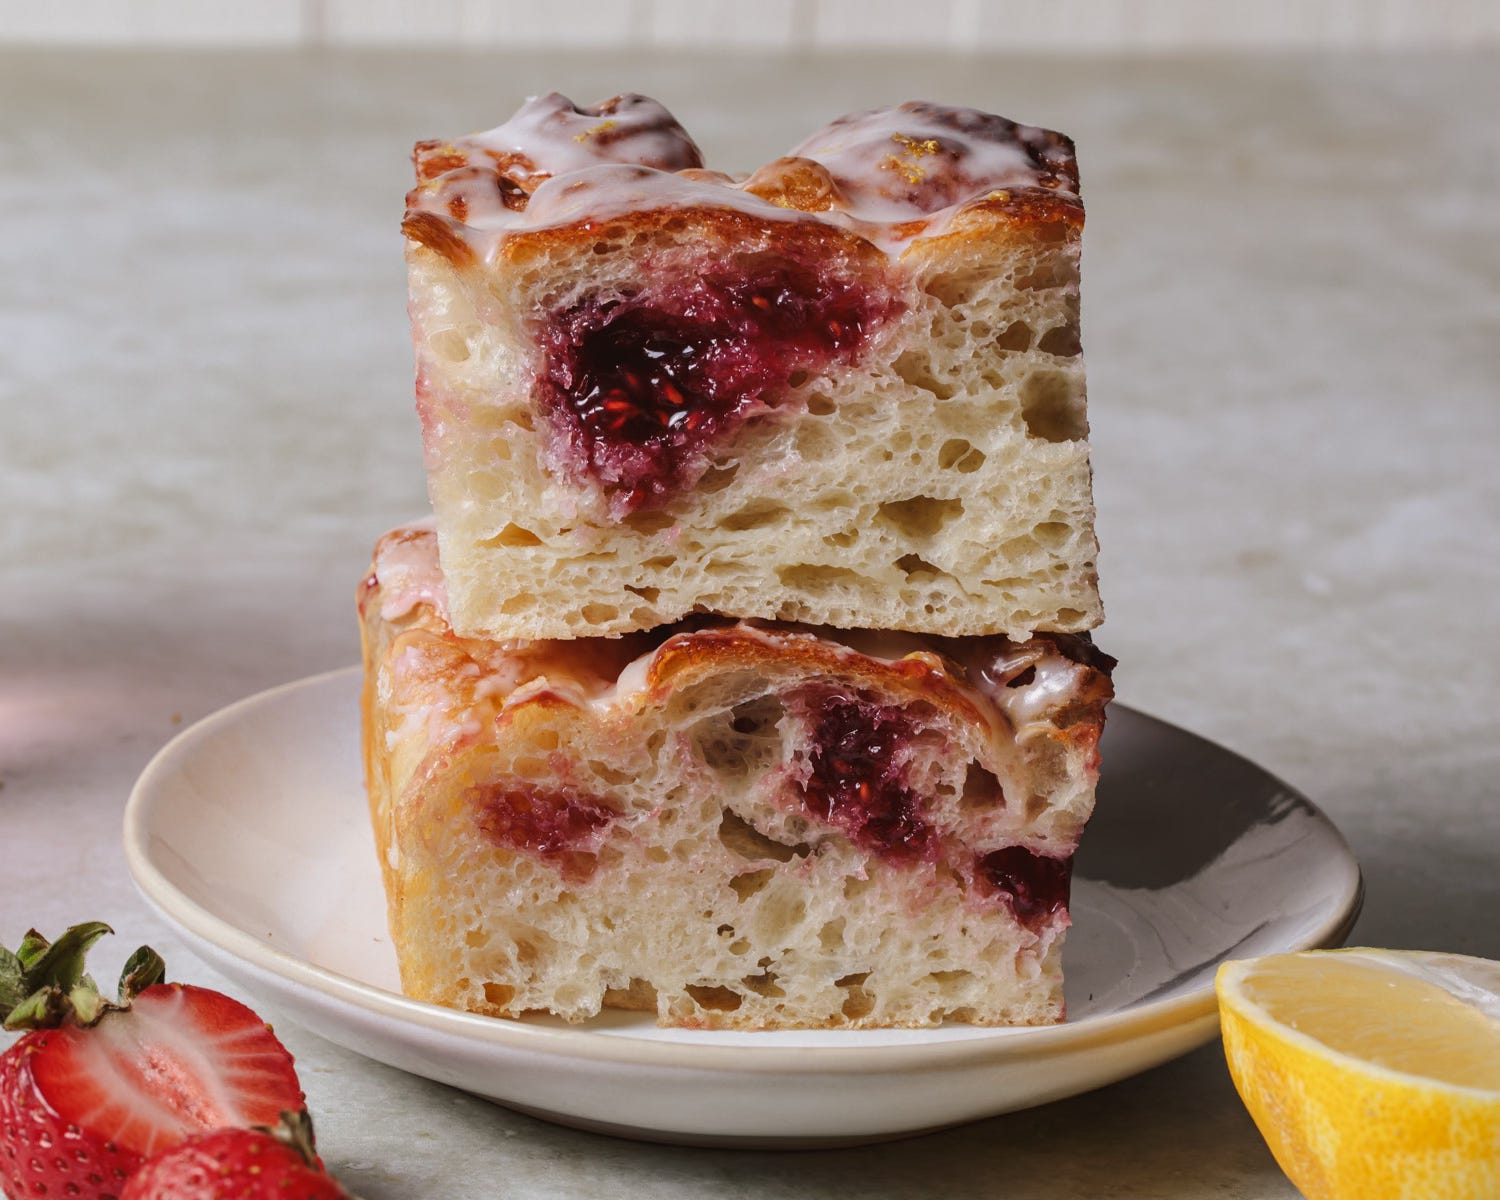
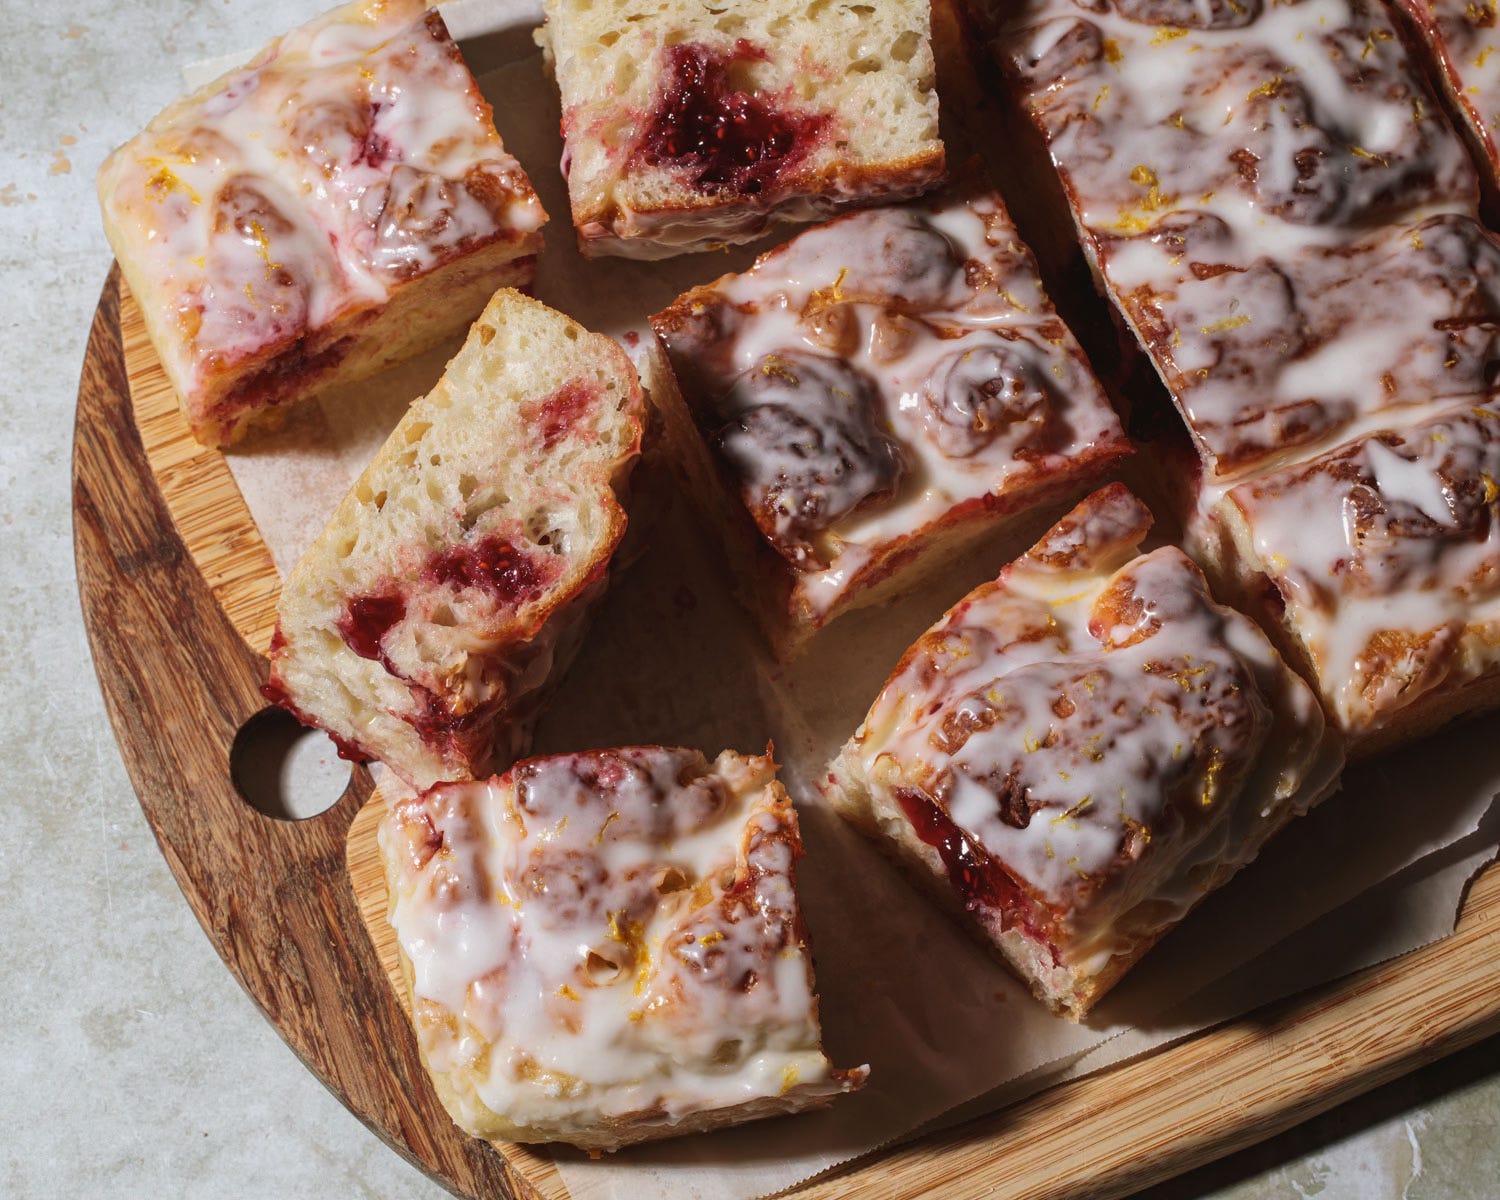
Since I’m on a constant quest to make most things at home, here’s my interpretation of a jelly donut. I’ve skipped the deep fry in favor of insanely soft and chewy focaccia that’s been injected with jam and smothered in a zesty lemon glaze.
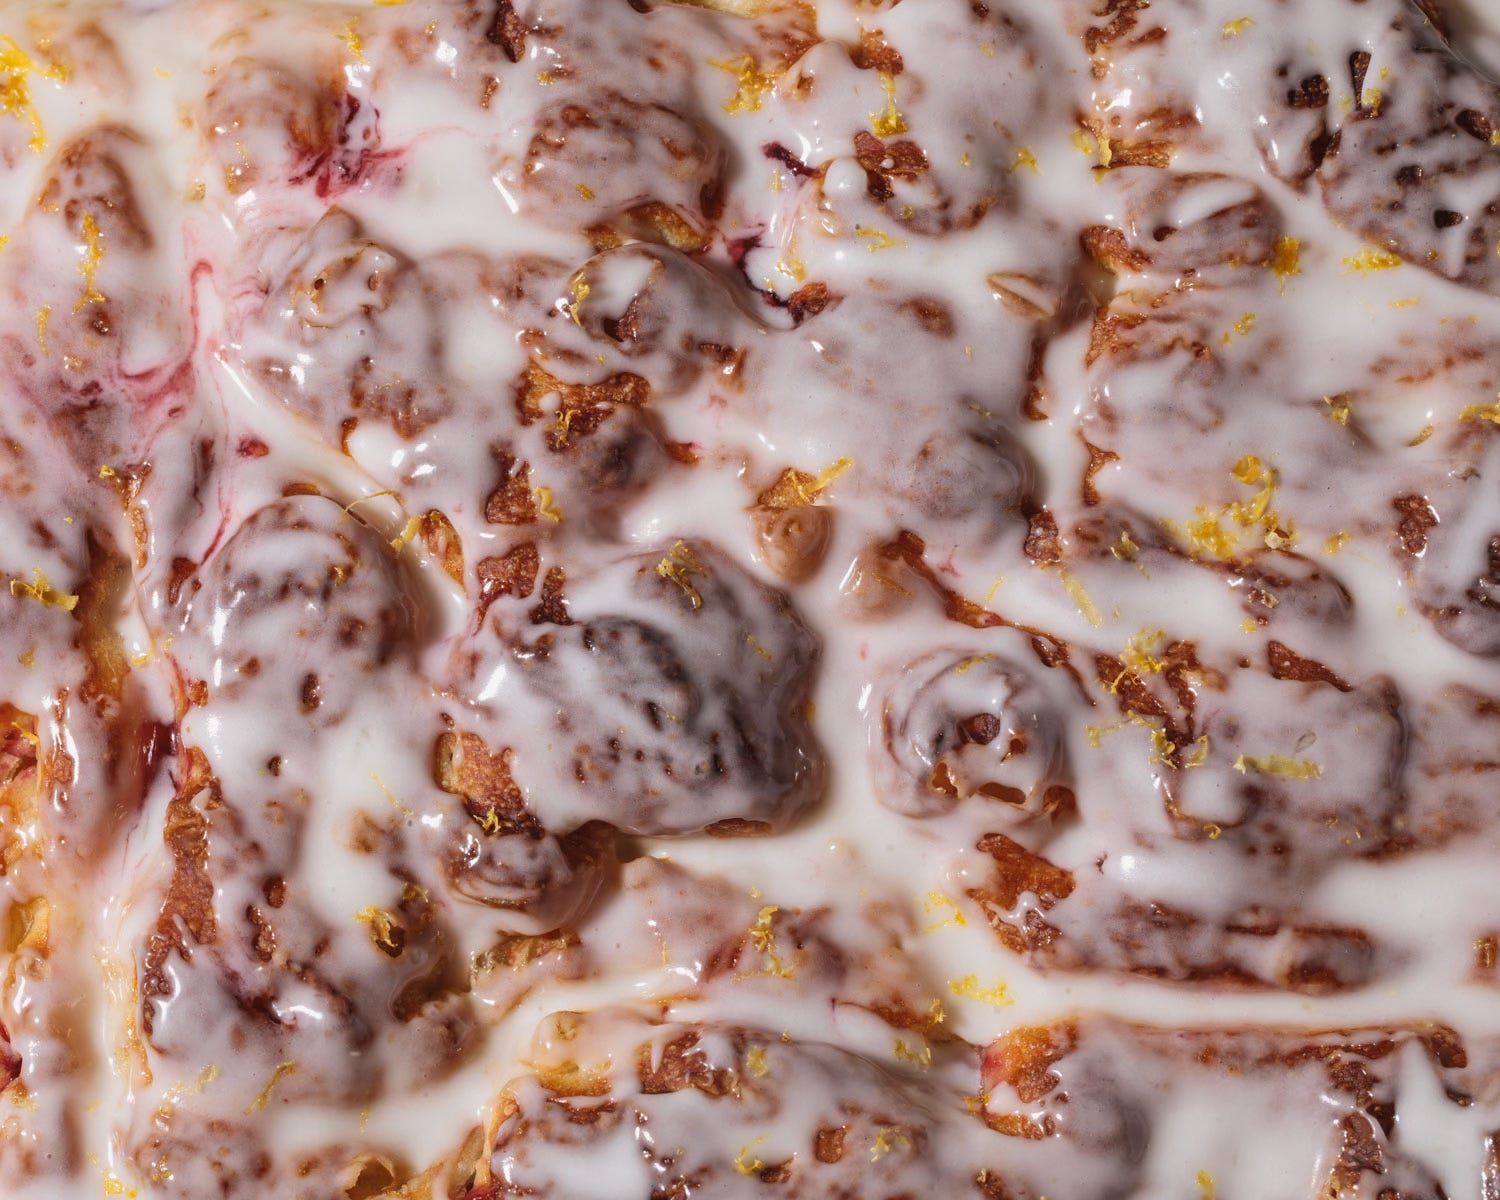
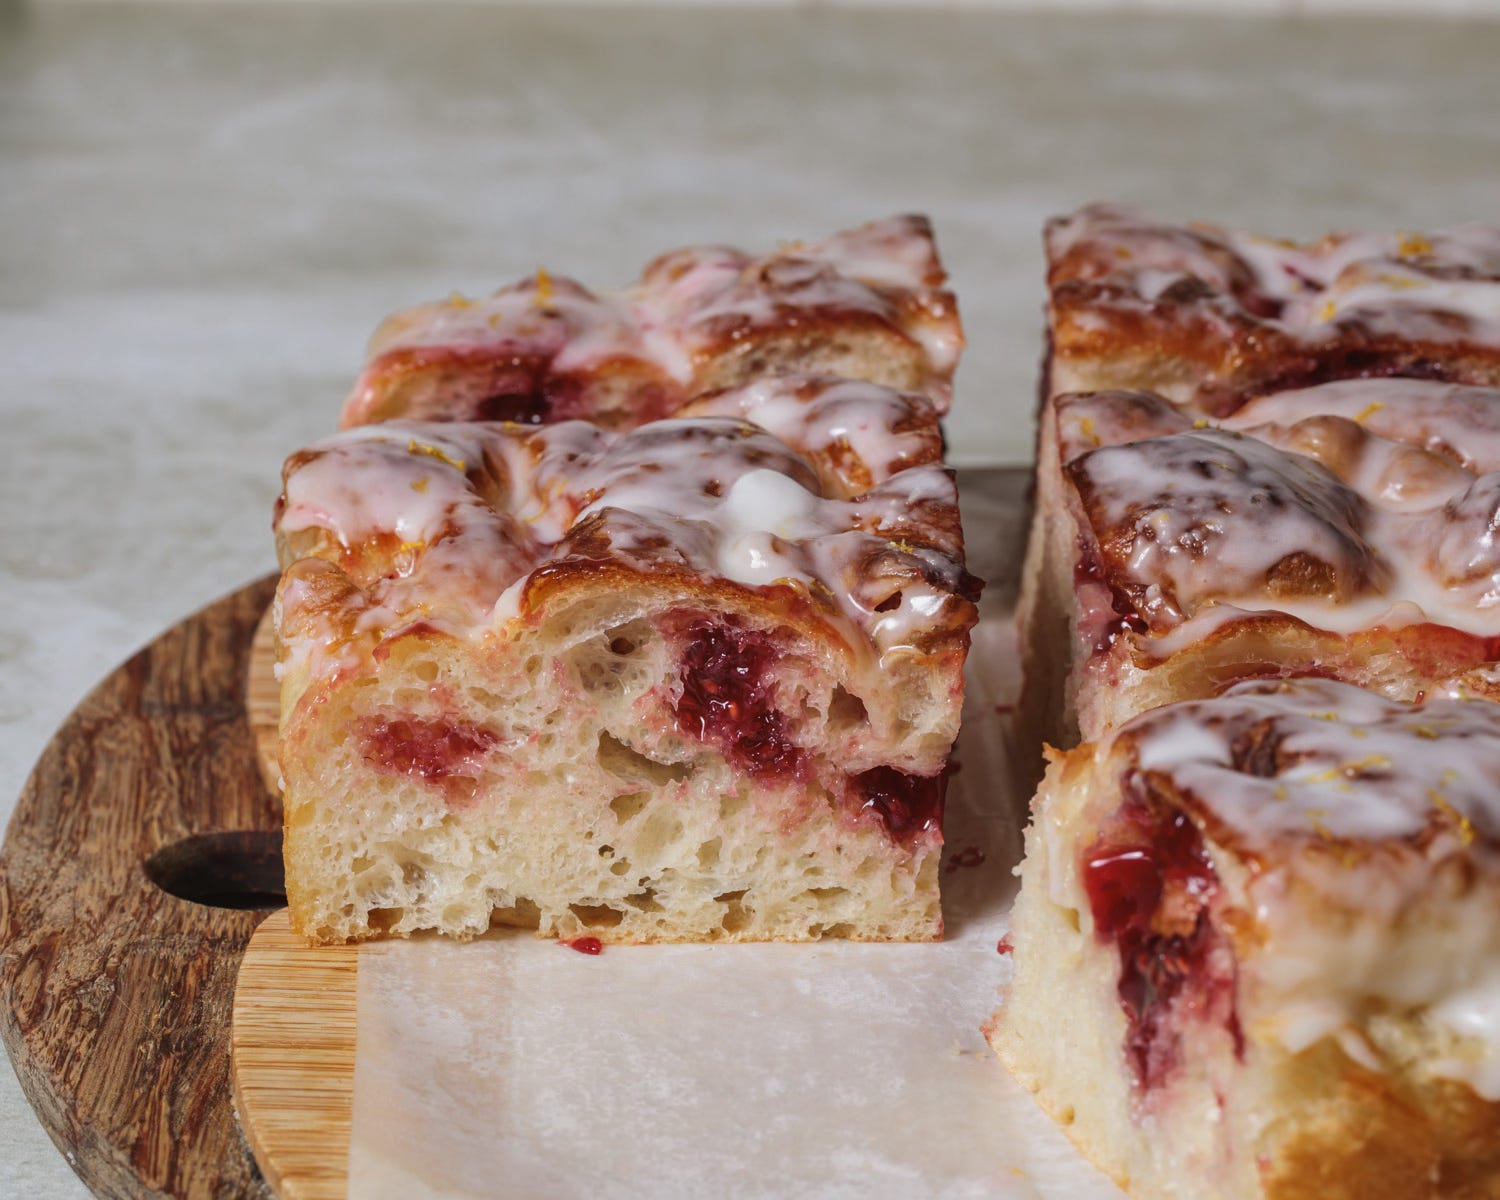
Fluffy focaccia bakes up with a crisp craggy surface and airy holes within the crumb that make it light and perfectly squishy. This makes it great for adding pockets of jam without weighing it down. No, it’s not actually a donut, but delightfully finger-licking in all the same ways.
Jelly Donut Focaccia doesn't save well and takes a bit of (hands-off) time in the morning to prepare, but it would be the perfect dish to bring to a neighborhood cookout or summer picnic. Memorial Day plans? End of Year BBQ? Make this! My kids were thrilled to come home to these after an afternoon bike ride over the weekend.
Tips and Tricks:
You need at least 12 hours of rest time in the refrigerator plus 3 to 4 hours to proof, so plan accordingly.
Poke holes into the baked focaccia with a chopstick and slightly hollow out the dough first then inject the jam using a piping bag.
For a full coverage glaze, drizzle it all over the top first then use a pastry brush to spread it around.
Cut through the top crust with a serrated knife before slicing all the way down to cut into individual squares.
Keep reading with a 7-day free trial
Subscribe to Baker's Notes to keep reading this post and get 7 days of free access to the full post archives.